How to create autumn colors in Photoshop CC
dinsdag 1 november 2016
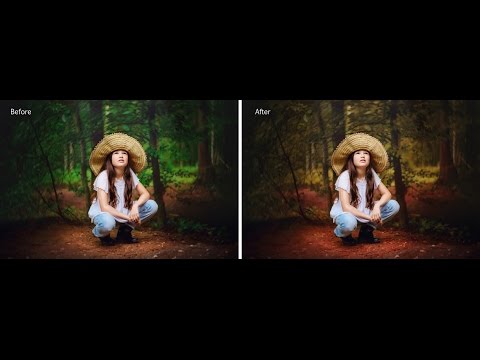
Always want to know how to create beautiful autumn colours in Photoshop? In this video tutorial I'll show you in a few simple steps how to turn your summer photo's in to beautiful fall images.
If you like this tutorial, please feel free to share and like it on Facebook.
Thanks for viewing.
If you like this tutorial, please feel free to share and like it on Facebook.
Thanks for viewing.
3 ways to create a matte effect in Photoshop CC
vrijdag 28 oktober 2016
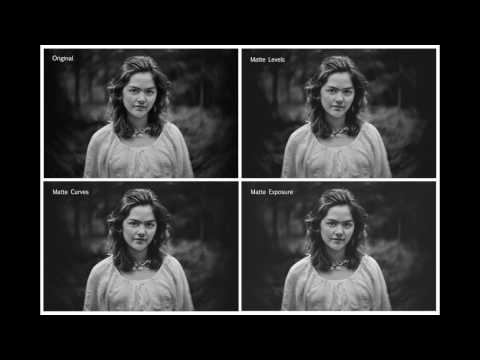
Always want to know how to apply a vintage matte effect on your images? Here's a link to a short and simple video tutorial about how to create this effect in 3 different ways in Photoshop.
If you want to stay updated on more tutorials, please follow me on this blog or like my FB page to get the notifications.
Hoe voorkom je bewegingsonscherpte in je foto's
donderdag 8 september 2016

Regelmatig krijg ik de vraag waar ruis in een foto vandaan komt terwijl er geen hoge ISO gebruikt is. Vaak blijkt dit achteraf geen ruis te zijn maar bewegingsonscherpte. Bewegingsonscherpte wordt namelijk vaak verward met ruis. In deze tutorial leg ik je graag uit wat het verschil is en hoe je bewegingsonscherpte kunt voorkomen.
Ruis zit namelijk in de donkere delen van een foto. En vaak zie je ook gekleurde spikkels in de foto's. Dit is kleurruis. Als je goed een foto met ruis bestudeert, dan zie vaak dat de ogen of je onderwerp toch wel scherp is. Alleen zit er een korrelige waas overheen, met name dus in de schaduwen. Mocht je ruisreductie gebruiken in Photoshop of Lightroom, dan zal je zien dat de ruis niet weggaat hiermee.
Wat je eigenlijk ziet is geen ruis maar bewegingsonscherpte. Bewegingsonscherpte zit over je hele foto. Dus niet alleen in de schaduwen. De oorzaak hiervan is een te lange sluitertijd en/of een verkeerde houding tijdens het fotograferen.
Ik fotografeer vrijwel altijd met een groot diafragma, zo groot als mijn lens aankan. Bij mijn 85mm is dit F/1.2. En toch krijg ik iedereen haarscherp op de foto. Zelfs bij groepen of muze met veel beweging zoals springen op de foto hierboven of dansen op de foto hieronder.
 |
| Canon 5dmk3 + 85L F/1.2 Heb je weleens gehoord van de regel dat je sluitertijd minimaal gelijk moet zijn aan het aantal millimeters van je lens? Dit om bewegingsonscherpte te voorkomen? Dus bij een lens van 50mm mag je minimaal een sluitertijd van 1/50 hanteren om uit te hand te kunnen schieten zonder bewegingsonscherpte te krijgen. Dit klopt tot op bepaalde hoogte. Daar wil ik graag eerst iets over uitleggen. Ik kom uit het analoge tijdperk. En iedereen die analoog fotografeert of heeft gedaan, kan beamen deze regel goed was om bewegingsonscherpte te voorkomen. Analoge lenzen zijn namelijk veel kleiner dan de digitale lenzen van tegenwoordig. Dit is ook logisch. Analoge lenzen hebben namelijk geen autofocus, USM, Beeldstabilisatie en weet ik veel wat voor een toeters en bellen nog meer. Digitale lenzen hebben deze opties wel. Dus het is ook logisch dat ze veel zwaarder en vaak groter zijn omdat er meer electronica etc in zit. Dat geldt ook voor de camera's. Mijn analoge camera is klein, compact en zonder al te veel toeters en bellen. Dit in tegenstelling tot mijn Canon 5Dmk3. Door alle electronica is deze camera een stuk groter én zwaarder dan mijn analoge. Eigenlijk klopt de "sluitertijd gelijk aan de lengte van je lens regel" dus wel, alleen geldt dat voor analoge camera's en lenzen. Dit, en nog meer regels die analoog wel opgaan, gelden digitaal niet meer. Maar het is handiger als ik je dit laat zien aan de hand van een voorbeeld. Kijk maar eens het verschil tussen beide camera's hieronder. Links mijn 5Dmk3 met de 50mm Sigma Art lens, rechts de analoge minolta met de 50mm Minolta lens. Wat een verschil in grootte hé! |

Het is dus logisch dat je met een grote en zware lens en dito camera veel eerder last krijgt van bewegingsonscherpte. Uit de hand schieten met een digitaal zwaargewicht is namelijk een stuk lastiger dan met een kleine lens en compacte camera. De sluitertijdregel gaat in dit geval dus digitaal niet op!
Maar wat is dan wel logisch? Dat ga ik je graag uitleggen. Om bewegingsloze beelden te krijgen uit de hand is het handiger om een sluitertijd van minimaal 1/200 te hanteren. Een kortere sluitertijd voorkomt namelijk dat je onscherpte krijgt door beweging. Je ISO zal dan wat hoger moeten maar tegenwoordig kunnen de digitale camera's dat prima aan. En zo lang je goed weet wat het licht doet en dat goed meet, krijg je nauwelijks ruis. Zelfs niet bij ISO van 6400 of wat hoger. Je kunt beter wat ruis hebben i.p.v. bewegingsonscherpte. Ruis kun je achteraf corrigeren. Bewegingsonscherpte niet! Onscherp is en blijft onscherp. Hoeveel je er ook aan nabewerkt.
Hieronder zie je een frontaanzicht van twee 50mm lenzen. De Minolta (analoog) en Sigma (digitaal). Wat een verschil in grootte, om over het gewicht nog maar te zwijgen!
 |
| Links analoge Minolta 50mm - rechts Sigma 50mm Art |
Nog een voorbeeld. Mijn 85L F/1.2 lens is zelfs zo zwaar dat ik hierbij niet eens onder de 1/400 kom met de SS (shutter speed afgekort). Ook geen probleem want deze lens is zo lichtsterk dat de F/1.2 dit opheft om toch een goed belichte foto te krijgen onder lastige lichtomstandigheden.
Nu je dit weet, kun je ook eigenlijk stellen dat IS (image stabilisatie) overbodig is. Vooral bij lange lenzen en wanneer je toch vooral buiten fotografeert. Neem nu de 70-200 F/2.8. Een enorm zware lens waarbij ze je eigenlijk gratis een abonnement op de sportschool zouden moeten aanbieden! De 70-200 is er in 2 varianten. Met- en zonder IS. Met IS is zelfs nog zwaarder dan zonder. En het verschil weegt ook behoorlijk zwaar in je portemonnee. Het verschil tussen met- en zonder IS is namelijk 1000 euro!
Zo had ik ooit de 70-200 2.8. Uitaard zonder IS. Waarom? Aangezien ik met zo'n lange lens alleen maar buiten fotografeer, staat mijn ISO nooit hoog. Aangezien mijn SS vanwege de grootte van de lens niet onder de 1/500 komt, heb ik de IS niet nodig. Dat is in mijn ogen zonde van mijn geld. En van de 1000 euro die ik hierop heb bespaard, zijn we heerlijk naar Zuid-Frankrijk geweest waar ik mooie herinneringen heb vastgelegd met de 70-200 zónder IS ;)
 |
| Canon 70-200 F/2.8 NON-IS |
HOUDING
Houd je, ondanks je kortere SS van minimaal 1/200 toch nog steeds onscherpte in je foto's, dan kan dit ook ergens anders aan liggen. Namelijk je houding en hoe je jouw camera en lens vasthoudt. Vaak is dit toch nog wel iets waar niet goed over nagedacht is. De hedendaagse camera's en lenzen zijn nu eenmaal groot en zwaar en daar hoort logischerwijs een stabiele houding bij. Tijdens mijn workshops zie ik vaak dat fotografen hun lens met hun hand vasthouden alsof het een ei is. Dit gebeurt vooral vaak bij fotografen met zoomlenzen. Ik zal eerst een voorbeeld laten zien hoe het niet moet. Mijn lieve zoon staat model voor deze foto's.
 |
| Zo moet het dus niet! |
Zoals je ziet in het voorbeeld hierboven, ondersteunt mijn zoon de lens met zijn hand van zich af. Eigenlijk wordt hier helemaal dus niets ondersteund! Stel je voor dat je vergeten bent om de strap om je nek te doen. Iets wat je altijd als eerste moet doen mocht de camera plotseling uit je handen glijden. Dan kun je er zeker van zijn dat de camera meteen op de grond ploft of de plomp induikt! Daarnaast staat hij niet stabiel of geaard op de grond omdat zijn armen niet kunnen steunen tegen zijn lichaam. Dit zorgt dus voor een onstabiele houding! Ook bij het fotograferen in de portretstand heb je geen ondersteuning meer als je arm waar je de ontspanknop mee indrukt naar boven laat wijzen. Bovendien is dit ook geen prettig aangezicht voor een ander als je veel zweet tijdens het fotograferen.
Maar wat is dan wel handig? Hieronder zie je een voorbeeld hoe je meer stabiliteit krijgt door het aanpassen van je houding en hoe je de camera moet vasthouden.
 |
| Armen naar je toegedraaid, tegen je lichaam aan en je lens in het kommetje van je hand laten rusten. De handpalm ondersteund je camera body. |
 |
| Houd in de portretstand je ellebogen naar beneden en je armen tegen je lichaam aangedrukt. Zorg dat je stevig en stabiel op de grond staat. |
In het bovenstaande voorbeeld zie je dat de camera en lens veel stabieler vastgehouden worden. De vingers en het voorste deel van de hand ondersteunt de lens en de handpalm de body. De armen zijn tegen het lichaam aangedrukt. Zo kun je ook eenvoudig je camera een kwartslag draaien mocht je overgaan naar de portretstand. Houd hierbij je armen ook weer goed tegen je lichaam gedrukt.
Je wenkbrauw rust vervolgens op de rand van je zoeker en je neus druk je stevig tegen je camera aan. Als je het goed doet, dan zal je vetvlekken van je neus op je LCD krijgen ;)
Houd dan je adem in en druk op de ontspanknop. Wat belangrijk hierbij is, is dat je zorgt voor een goede en stabiele houding. Dus stevig met beide voeten iets uit elkaar op de grond staan.
In het kort nog even een herhaling van waar je rekening mee kunt houden om bewegingsonscherpte te voorkomen:
- Zorg voor een stabiele houding
- camerastrap om je nek!
- Houd je armen tegen je lichaam aangedrukt
- ondersteun je lens en camera met je handen richting je lichaam.
- Druk je wenkbrauw aan de rand van je zoeker en je neus tegen het LCD
- Stel je camera in en zorg hierbij dat je SS niet onder de 1/200 komt. Hoe zwaarder en langer je lens, hoe korter je SS.
- Houd je adem in en druk op de ontspan knop.
- Vergeet niet uit te ademen.
Maar vooral... Geniet! :)

My summer at Mallorca beach with the Fujifilm Xpro 2
woensdag 31 augustus 2016

It was the first time that we went there but definitely not the last time! What a gorgeous place with the small, hidden beaches, nice people, amazing food but most of all, the very clear, almost emerald water! A real sight for sour eyes! A lot of my days at Mallorca started with watching a beautiful sunrise and capturing images with my children who are also Fujifilm freaks. My son has the Fujifilm X-E1, my oldest daughter the X-T1 and the youngest has also an X100S. I guess you can call us the Fujifilm Family ;)
 |
| Image of me and my son captured by my daughter and her X100S. |
For this vacation I brought the Fujifilm Xpro 2 and the X100s, the Fujinon lenses 16-55 F/2.8 and of course... the Lensbaby Edge 80! Ever since I became the proud owner of the Fujifilm Xpro 2, I fall in love with this camera every day a bit more. It's so amazing! No matter what kind of photography you are shooting, portraiture, nature or street photography, the Xpro 2 nails it every, single time! Low light or harsh sun light is no problem for this camera. Along with the Fujinon 16-55mm, it's the perfect combination for city trips or vacations. The 16-55 is an amazing lens. Tack sharp and fast. It's as good as a prime! But don't underestimate the power of the "old" X100s! This little "perfect for my handbag" camera is like magic! Every single shot is a keeper! The X100s makes me think, stop and be more creative because I only shoot in Jpg with it.
 |
| Our room with a view during the Blue Hour - Xpro2 + Lensbaby Edge 80 |
The Lensbaby Edge 80 is one of my favorite and most used Lensbabies. I really love the tilt-shift effect of it and the bit of drama and painterly feel it gives to my images.
I shot a lot of images this summer. Not only at Mallorca but also in London and the Netherlands, where i live. I will dedicate a next post to my trip to London. For now, I stick with my Mallorca images. All images are shot in JPG because is was to lazy to edit all the images in RAW ;) But thanks to the amazing dynamic range of the Xpro 2, that's no problem.
Hope you'll enjoy watching the images and thanks for viewing!
Just a last short note: Beware... It's a huge share ;)
 |
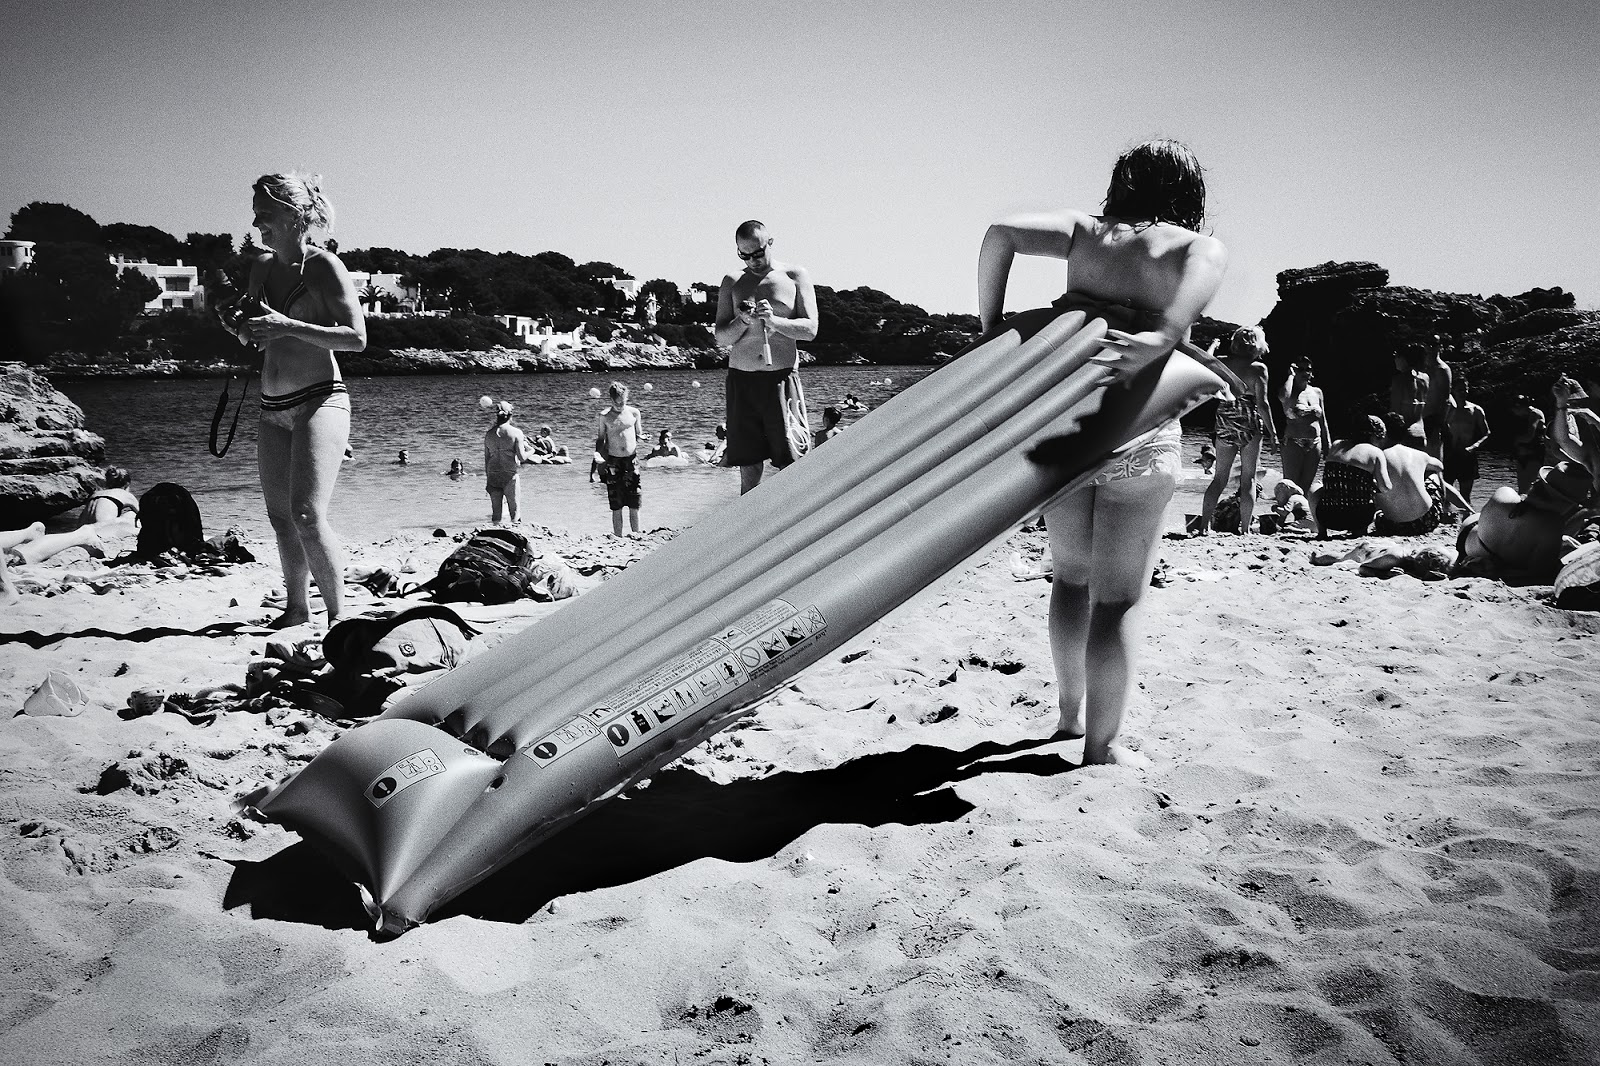
| Beach of Mallorca - Xpro2 + Lensbaby Edge 80 |
 |
| X100s at the sandy beach |
 |
| Xpro 2 + Lensbaby Edge 80 |


 |
| Xpro 2 + Fujinon16-55 F/2.8 |


 |
| How beautiful can a sunset be! - Xpro2 |

 |
| The dynamic range of the Xpro2 is amazing! |


 |
| Fresh melons at the beach |
 |
| X100S - That blue water! |
 |
| After a long day of photographing, it's time to take a rest in the emerald sea ;) |


 |
| Those water bikes! Xpro2 |


 |
| The tilt shift effect of the Lensbaby Edge 80. |
 |
| On our way back... The Netherlands through the window of the airplane. - X100s |
Weather sealing Fujifilm X-pro2, Lensbaby Edge 80 + Zhongyi Lensturbo II
vrijdag 8 juli 2016

|
| fujifilm Xpro 2 + lensbaby Edge 80 |
And on top of it, the Fujifilm X-pro2 has really proven itself to be weather sealed. It was raining very hard so we hide under the trees and kept shooting. No problem for the X-pro2. And even my Lensbabies were outstanding. Not one drop has leaked into my camera or Lensbabies. The second image was shot with the Canon 5D MK III. Just after the rain has stopped. I was too afraid of using it during the rain. But that's maybe something to try out the next time ;)
 |
| Canon 5D mk III + Lensbaby Twist 60 |
Street photography in Valencia with the Fujifilm XT1, Fujinon & Lensbaby
maandag 4 juli 2016

|
| Lensbaby Edge 80 |
For this 3 day trip, which is actually to short to visit this gorgeous place, I brought my FujiFilm XT1, the Fujinon 16-55 F/2.8 and the Lensbaby Edge 80. The XT1 was a rental since my 60 pound dog jumped on my own XT1 a few days before my trip and left me with a cracked LCD. I can't tell you how heart broken I was after I saw that my beautiful and beloved Fuji was mashed up by my dear dog. I will never know why he jumped on the table where my camera was. I guess he thought that he had turned into a cat but luckily my dog didn't get hurt. A camera can be replaced, my dog can't.
Anyway.. Thanks to the fantastic Fujifilm Customer Service in Europe, I had a spare XT1delivered the next day and my broken Fuji was taken care of. :) This is one of the things why I like Fujifilm so much: If you have a camera or lens problem, they'll fix it sooner than you can spell "Fujifilm".
 |
| Fujinon 16-55 F/2.8 - Streets of Valencia |
 |
| Streets of Valencia at noon. Fujinon 16-55 F/22 |
To bring the XT1 (the Xpro2 wasn't out yet) along with the Fujinon 16-55 and the Edge 80 was a good choice. I don't like to bring to many lenses while I'm on a city trip. Too many lenses gives too much noise in my head of what lens to use. I rather focus on my vision and image than to be busy with making choices and changing lenses. This distracts me from my actual goal: to capture life how I see it.
 |
| Museum of Art & Science - Lensbaby Edge 80 |
In my previous trip to Paris, the 16-55 has proven to be a good choice and in Valencia it showed again that this lens is a real work horse! Normally I only use primes but for city trips, my go-to lenses are one zoom and one prime. The Fujinon is fast, accurate focus, amazing colors and tack sharp. It's a bit bulky but I've taken it for granted because of the amazing IQ. The Lensbaby Edge 80 has always been one of my favorite Lensbabies, so this was an obvious choice to bring along with me (since the Twist wasn't out yet). The Lensbaby helps me to create more artistic images.
 |
| Little Venice - Fujinon 16-55 |
I will certainly go back to Valencia to shoot some more but here you have a little impression of this fun city trip.
For now, I'm going to pack by bags and gear because within a few days my Fuji Xpro2 and me will take off to Mallorca to shoot some underwater scenes. I'll keep you posted. ;)
Have a great and wonderful summer!


 |
| The beautiful paintings in the Cathedrals at Valencia |

 |
| I really love the architecture of the cathedrals |

 |
| Museum of Art & Science - Lensbaby Edge 80 |


 |
| The streets of Valencia. Even here you see the police on every corner of the streets. |
 |
| This is a different kind of art. Sand castles at the beach |
 |
| Every where you look there are growing oranges in the trees. |


Abonneren op:
Posts (Atom)